Resources & Best Practices for Transcript Post Production
This document walks through the best practices to transcribe the oral histories, stories, and memories collected during the day-of collection event.
This is broken down into four sections:
- How to download and open an audio file
- Transcribing without access to transcription software
- Transcribing with access to transcription software (Otter.ai, Microsoft Word, notta.ai, etc.)
- What to include in the transcription
How to Download and Open an Audio File
This section covers how to download and open an audio file from your computer. During the collection event, you will have retrieved the audio file from the recording device, renamed it, and stored it in a folder.
Note: If you are using an online storage software such as OneDrive or Google Drive, and you are not using a transcription software, you may not need to download the file to your local computer.
How to Download an Audio File
Note: The screen captures used during this section are from Google Drive and will use an arbitrary Object ID, used to show the file nameing convention suggested earlier in this guide.
The steps are as follows to download an audio file:
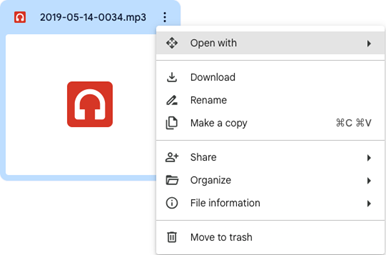
- Click on the three dots next to the file name

- Select “Download”
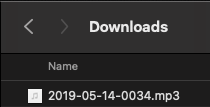
- Locate the file on your local computer. By default, this will be your Downloads folder
How to Open an Audio File
To open an audio file, simply double-click on the file on your computer. This will open the file in your computer’s default media player. This is the common way to open an audio file to transcribe it without the use of a transcription software.
Note: If you are using audio captured on a smartphone, you might encounter some errors when trying to open audio captured on any Android device on an iOS/Mac device and vice versa. This will normally be caused by a file-format difference. We are still trying to troubleshoot this problem.
For opening an audio file using a transcription software, there will traditionally be an “Upload Audio” button.
Transcribing without Access to Transcription Software
This section covers the best practicies for transcribing audio files without the use of 3rd-party software. This includes:
How to Transcribe an Audio File
This covers the best practices for transcribing an audio file manually. This is a tedious and time-consuming process, so do not be detoured by the process.
Here are some notes for best practices:
- Listen to the audio file a few seconds at a time to transcribe. Do not try to transcript larger chunks at one time.
- Replay sections as needed for clarity
- Some audio players allow for audio to be slowed down. If a section is going too fast, this is an option.
- Adjust the volume level as needed for audio levels. Depending on the quality of the oral history interview, the audio recording may be louder or quieter than normal.
- Write down all spoken words
- You and your team will need to decide whether or not to include various words and punctuation (see What to Include in a Transcription section)
Transcribing with Access to Transcription Software
This section covers the best practices for transcribing audio files with the use of 3rd-party software. This includes:
- How to import an audio file
- How to view the transcript
- Best practices for cleaning a transcribed audio file
We recommend, if possible, to use a Microsoft365 account version of OneDrive for this process. Using Microsoft Word in OneDrive allows for the transcript to be placed in the same folder as the audio file and other files for each contribution.
- Information on purchasing a Microsoft365 Account can be found here.
- If you only plan on using Microsoft365, the cost (as of November 2023) is:
- Personal (1) Account: $6.99/month or $69.99/year
- Family (up to 6) Account: $9.99/Month or $99.99/year
Notes:
- For this section, all screen captures will be from using Microsoft Word through OneDrive, with a Microsoft365 account.
- Transcription software is not 100% accurate. Additional clean-up will be needed.
- If your audio file has more than one language in it, you may have to run the file through the software in each language or you may need to transcribe the second language by hand.
How to Import an Audio File
To import an audio file:
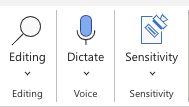
- Select “Dictate” from the Home Toolbar
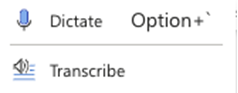
- From the dropdown menu, select “Transcribe”
- Select “Upload Audio”
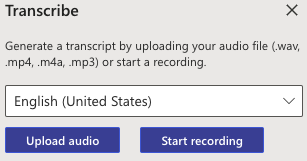
- This menu gives the option to select the language that the audio file is in.
- If the audio file contains more than one language, see Notes above.
- Select the file from your computer to upload
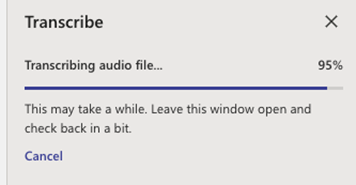
- This uploads the audio file to the computer and runs the transcribing program on it. This process takes anywhere from a few seconds to minutes, depending on the file size.
The Transcript
![]()
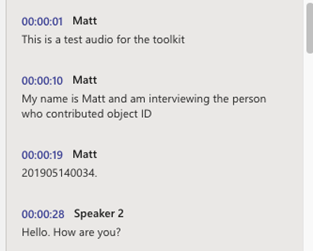
Once the audio file has been transcribed, it will appear in the side panel.
By default, the transcript will show the file name over the audio options, timestamps, and which speaker is speaking.
The audio controls are pinned to the top of this panel, allowing you to edit the transcript as the file is playing, without the need to scroll each time.
Notice that not all the text from one speaker is under the same timestamp. This is because Microsoft Word’s (and other transcription software) transcription feature transcribes by when words are spoken.
Once the transcript has been fully edited, they will be condensed under one “Speaker 1”.
To edit the transcript:
- Hover your cursor over the text box. A pencil icon will appear
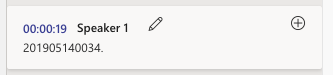
- Select the pencil icon to open up the editing options
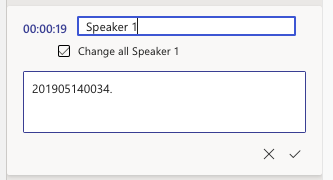
- This allows you to edit the name of the speaker and the text that was transcribed
- If the checkox labeled “Change all Speaker 1” is checked, this will change all “Speaker 1” labeled timestamps to the name inputted
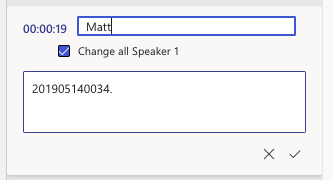
Notice that all the “Speaker 1” timestamps have now changed
- You can also update the transcription here. This example is updating the Object ID in the transcript

- Once all the changes to the transcript have been made, select “Add to document” at the bottom of the panel.
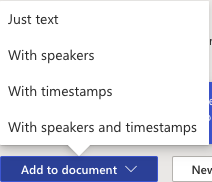
- There are multiple options that can be selected here:
- Just text
- Text only. No speakers ot timestamps will be added to the Word document
- With speakers
- The speaker’s name will be added to the Word document with the transcription
- If there are multple sections of the same speaker in the transcript in a row, they will be grouped together.
- With timestamps
- The timestamps will be added to the Word document, separating when words were spoken
- With speakers and timestamps
- Both the timestamp and the speaker will be adde to the Word document
- Just text
- After selecting an option, the transcript will auto popolate in the Word document
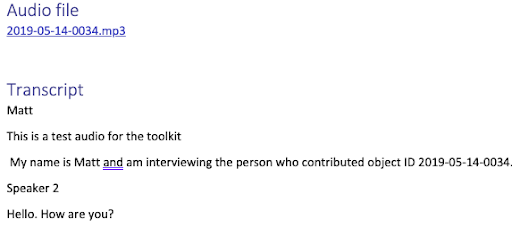
Notice a few things:
- The audio file is hyperlinked at the beginning of the transcript. This makes it easier for the person who contributed the oral history to locate and listen to it
- The transcript is labeled and separated by the speaker, with all the transcriptions grouped under their name
Other transcription softwares don’t include the audio file in the transcription and require additional steps to export the transcript into a readable document. This is the reason we recommend using a Microsoft365 account, OneDrive, and Word within OneDrive.
Best Practices for Cleaning a Generated Transcript
Transcription software is not 100% accurate.
Some common errors the software makes include:
- Adding in punctuation based on breaks in the audio and tone of voice
- Misspelling names and locations
- Inserting the wrong Word
- Many more
When cleaning a generated transcript:
- Listen to the audio carefully and in small chunks to follow along and fix the errors easily
- It is possible that a word or phrase was not recognized by the transcription software and is therefore not in the transcript
- Do not add in punctuation while editing in the side panel
- Add an remove punctuation once the transcript has been added to the document
- Decide on whether to include pause-words such as “um” and “like” in the final transcript (see more below)
- If another language is present, remember you have two options:
- Upload the audio file in another document with the second language selected
- Transcribe the second language by hand
What to Include in a Transcription
This is a common question that we as a team at IDAH constantly struggle with. Do we include every “um” or “like” in the transcript for its full authenticity? Do we go through and correct the grammar? Do we remove the duplicated words? The answer to these and similar questions, unfortunately, is that it is up to you, your team, and the overarching goals of your community archive.
For Returning Files to Contributors
For returning the contributor’s raw files, clean up for the transcription should be kept to a minimum. This includes:
- Naming who is speaking throughout the transcript using the naming convention you and your team decide on
- Flagging words and/or phrases and having another person listen to the transcription for any low-quality or soft-spoken sections
Keeping the files and the transcript alteration at a minimum allows for the contributor to have their experience preserved best.
An example screenshot of a transcript that uses repeated words
Preparing Files for Upload
For preparing the transcripts for upload, normally the cleaner the transcript, the better. This includes:
- Naming who is speaking throughout the transcript using the naming convention you and your team decide on
- Flagging words and/or phrases and having another person listen to the transcription for any low-quality or soft-spoken sections
- Deciding on whether or not to have timestamps added throughout the transcript
- “00:00:01 Interviewer: Example Question Here”
- “00:01:34 Contributor Name: Example Response Here” Or:
- “Interviewer: Example Transcript Here”
- “Contributor Name: Example Response”
- Removing repeated words
- Removing pause-words such as “um” and “like”
When preparing transcripts for uploading, think of someone reading them like they would read a book or a published newspaper interview:
- What information would they need to read in the transcript in order to get the best picture of what was talked about?
- What would you and your team include from the transcript so the reader could feel like they were listening to the recording and not just reading it?