
Posting Items
A Quick Overview
The item IDs you chose during the event are the single most important piece of prep work for posting items.
The item IDs assigned during the event are used to name two sets of files, each of which belongs in a specific folder:
- The first is a single text-only file that contains text-based information about each piece in your community archive. See Anatomy of an Item Text File below. These should be stored in the
_itemsfolder. If the item ID was2025-05-31-001-photo, this text file will be called2025-05-31-001-photo.md. - The second are the photo or photos that were taken of the object. It’s likely that you’ve named the photos already (see Naming Files after the Event)
For specific information on posting your images, transcripts, etc., see Photos, Audio, or Video
- NOTE: For all of these, you will need to have the files on your local computer. You cannot upload to Github directly from Google Drive or other file hosting services.
Create an Item Text File
Before you delete the sample items, make your first item .md file or else the _items folder will disappear.
The meta-data that you prepped using contributor sign-up information in the post processing phase will give you all of the information you need to fill out the text file.
- Use a word processor (Microsoft Word, Google Docs, Mac Pages, etc.) to edit the information in your item text file first. (See “Anatomy of an Item Text File” below for an in-depth guide)
- Open the
_itemsfolder in your Github repo. - Press the “Add File” button and choose “Create New File”.
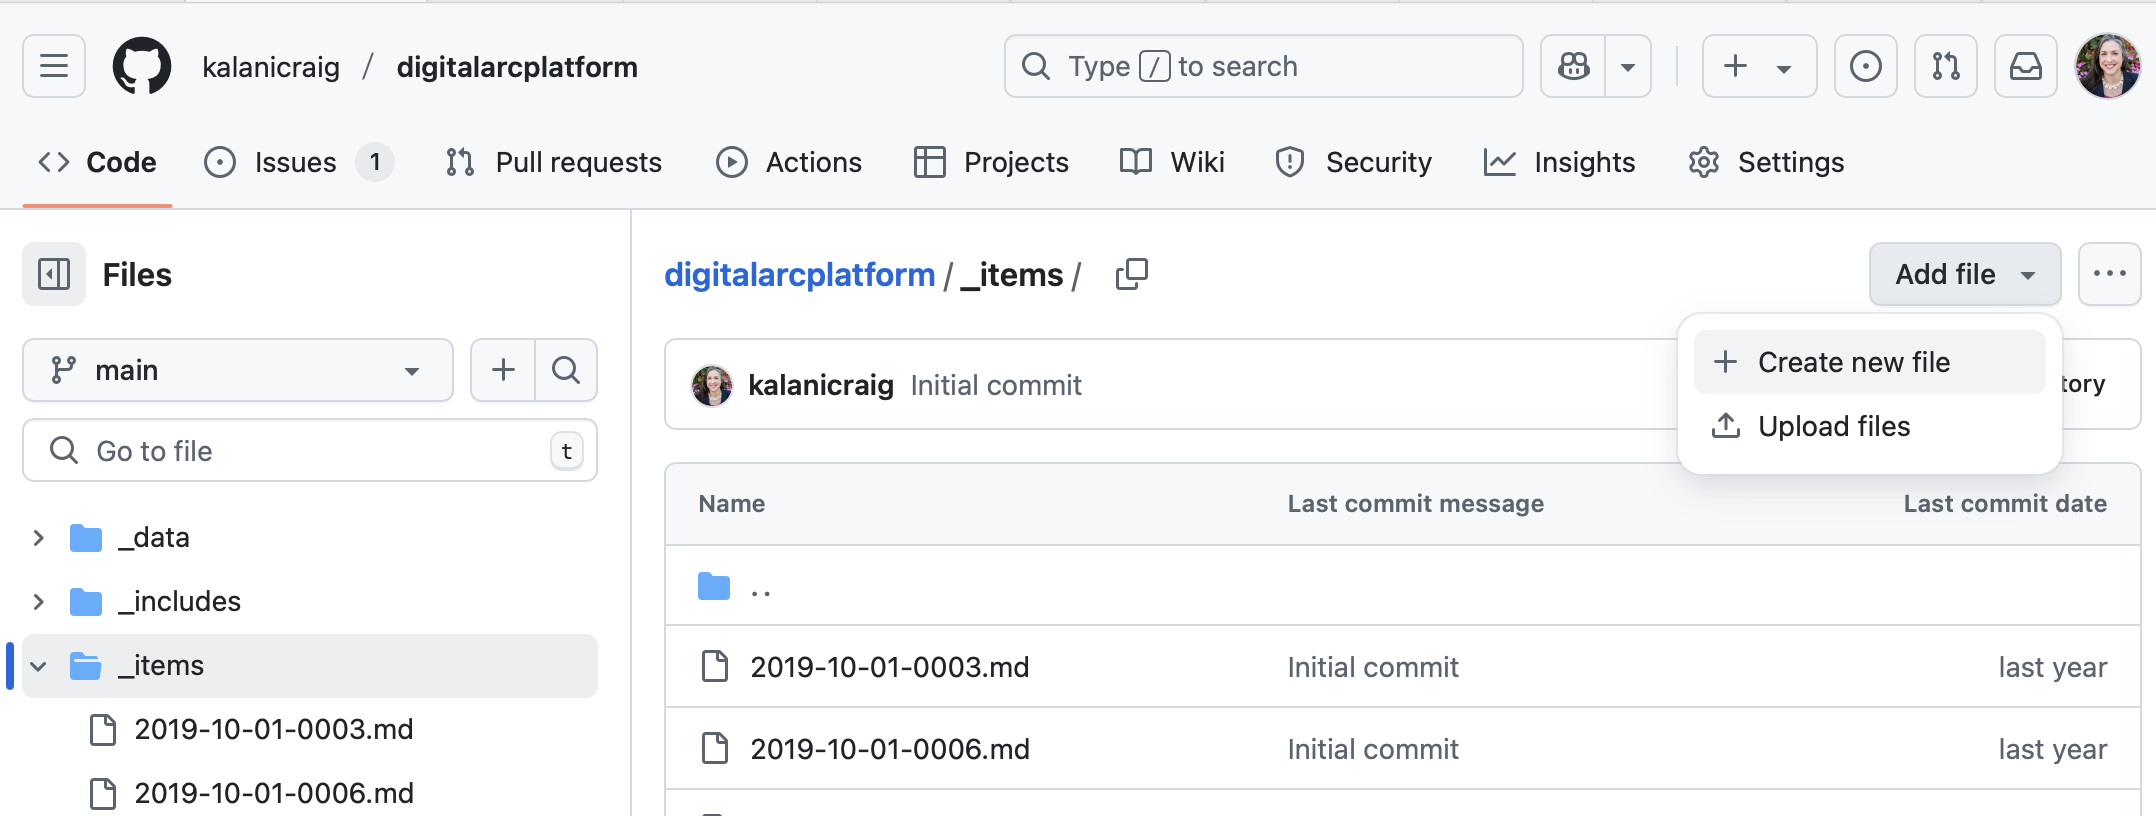
- Find the “Name your file” field and enter the file name. (In our example,
2025-05-31-001-photo.md)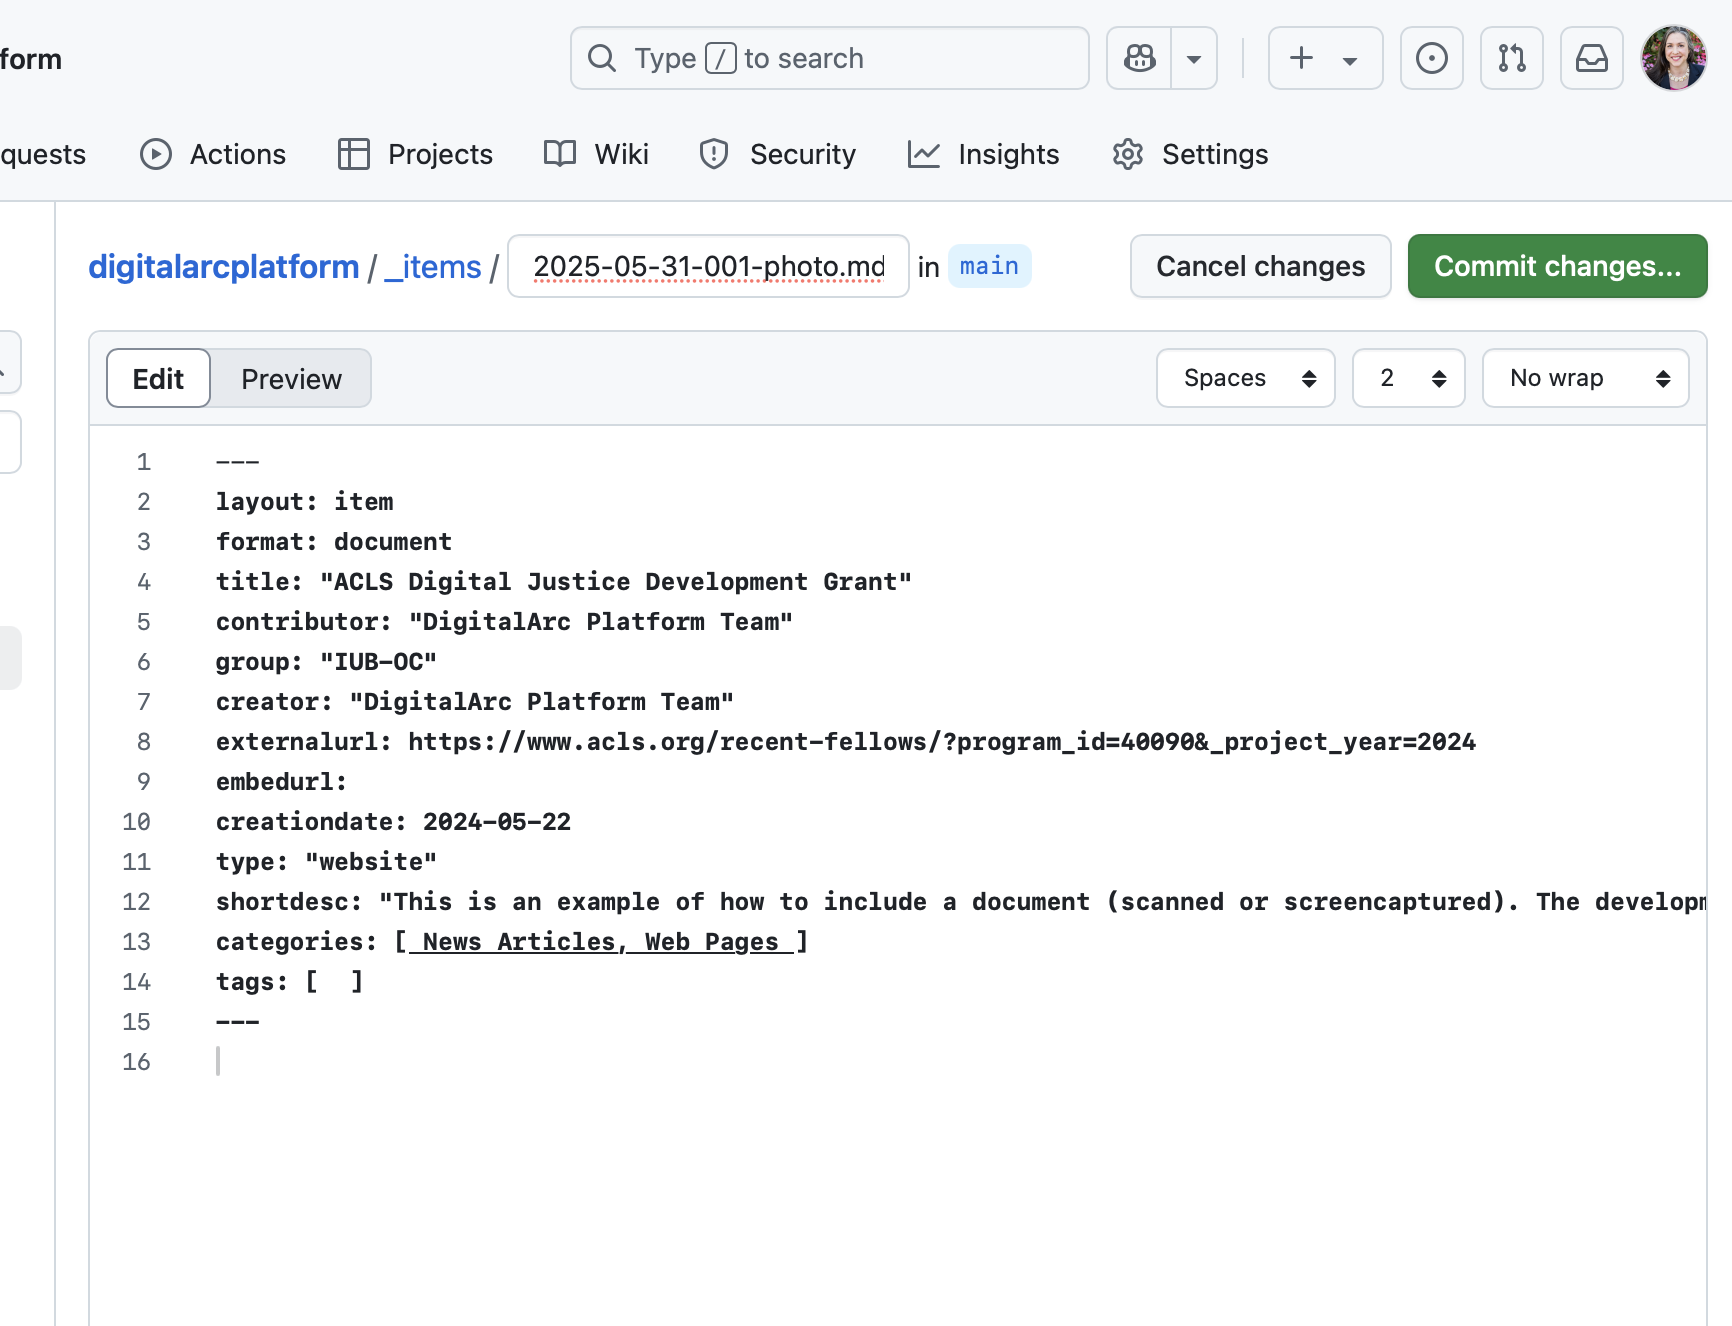
- Find the “enter file contents here” field. Copy and paste the information from your word processor into that field.
- Press the “Commit changes” button.
- In the pop-up window, press the “Commit changes” button again.
Caution: Computers Are Picky
As you look through these examples, you’ll see colons :, spaces, and quotes " used to divide information that’s important to you from information the computer uses to format your pages. Check each of these things for each line of information in this part of your file
- Colons should always be followed by a single space.
- If the example uses a quote around a piece of information that’s after a colon and its corresponding space, keep the quote. If the example doesn’t have quotrs, don’t use a quote.
- There should not be spaces at the end of these lines.
- Make sure your spaces are actual spaces using the space bar on your keyboard, rather than tabs.
Anatomy of an Item Text File
Example
---
layout: item
format: document
title: "ACLS Digital Justice Development Grant"
contributor: "DigitalArc Platform Team"
group: "IUB-OC"
externalurl: https://www.acls.org/recent-fellows/?program_id=40090&_project_year=2024
embedurl:
creationdate: 2024-05-22
type: "website"
shortdesc: "This is an example of how to include a document (scanned or screencaptured). The development of the DigitalArc Toolkit was funded by an ACLS Digital Social Justice grant in 2024."
categories: [ News Articles, Web Pages ]
tags: [  ]
---
Get a blank template of the item-page markdown by clicking here
Explanation of each part of the example
Three hyphens
At the top of the example item text file, you’ll see three hyphens --- . These tell the system that builds your website that there’s metadata, or information about an object that’s used to build the web site, coming up. The first line of every item file needs to be these three hyphens, without any extra spaces or characters after the hyphens.
Layout
The next line starts with “layout” and has the word “item” after the colon. This says, “Please use the layout that DigitalArc has customized to automatically display item photos, transcripts, and item info”. This line is also helpful for understanding the other lines of metadata.
Other “variables”
Each metadata line has a variable–“layout”–and a value for that variable. That is, the variable before the colon says “this is a placeholder”; whenever the website system sees a reference to “layout”, it will replace that reference with the actual value that comes after the colon (“item” in this case).
The lines that follow these first three hyphens are variables and values that hold the object info that you prepped in post-processing, including things like “item name” and “contributor name”.
Categories and Tags
Categories control the filter buttons that show up on the main collections page (see https://digitalarcplatform.github.io/demo/collection). The square brackets that show up here only occur once, regardless of how many categories you list. Here’s an example of the category line with one, two, and three categories.
- Single category:
categories: [ News Articles ] - Two categories:
categories: [ News Articles, Web Pages ] - Three categories:
categories: [ News Articles, Web Pages, Books ]
As of version 1.0.2 (February 2026),, tags are not yet used.
Three more hyphens
After the metadata, there’s another set of three hypens to mark the end of the metadata. Like the hyphens that start each item file, these need to be on their own line with no spaces before or after
Adding more detail
If you don’t want to write any additional information after the last three-hypen line, you don’t need to.
If you do have other information that you’d like to include, press “enter” or “return” to add a blank line after the metadata-closing hyphens and then type whatever you want. The text that you display here will show to the user below the photos on the website. That text is formatted using “markdown”, which is a simple text-based way to tell the computer to make text look the way you want it to.
# big header## medium header**bold***italic- To make bullet points, put a hyphen and a space at the beginning of each line that should have a bullet point:
- bullet point text - To make a numbered list, put a 1, a period and a space at the beginning of each line that should have a number, and the computer will auto-number the list for you:
1. number one.
1. number two.