
Batch Processing with Photoshop
If you have access to Photoshop, this section covers how to clean the photos from the collection event in a batch process. This means that the edits you make will be applied to all the photos in the collection at one time, which should eliminate time spent on photo cleanup.
How to Batch Resize Photos
Your photos may vary in size, and this might impact your ultimate output onto the digital community archive. Batch photo resizing can ensure that all photos are similar pixel length and will appear similarly sized on the digital archive.
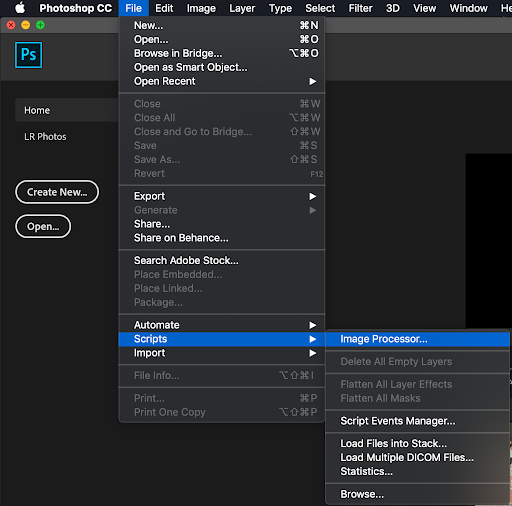
- Open Adobe Photoshop. Choose File > Scripts > Image Processor.
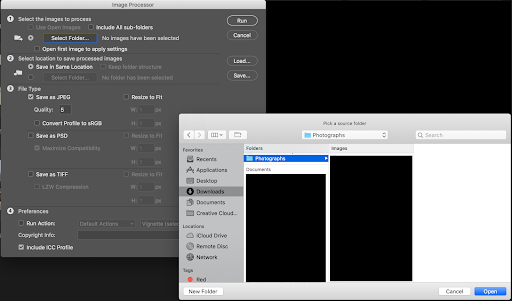
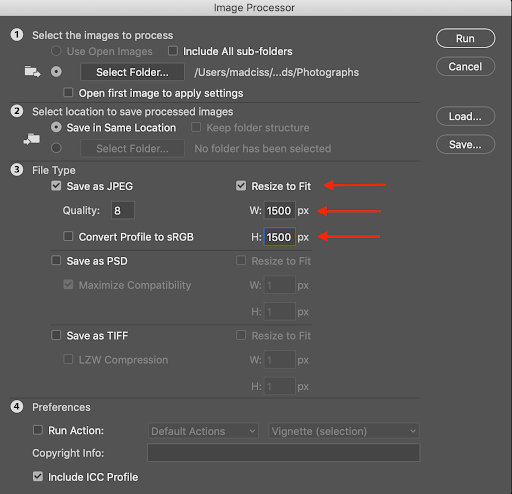
- A dialog box will appear. In the section labeled “1- Select the images to process”, click the “Select Folder…” button, then navigate to your chosen folder in the pop-up window below. Click “Open” in the bottom right corner.
- In the section labeled “2- Select location to save processed images”, Select the location for the saved processed photos. If you choose “Save in Same Location”, Photoshop will create a subfolder in that original location. If there is already a subfolder with the same name, Photoshop will add a number to the new subfolder to differentiate it from the original.
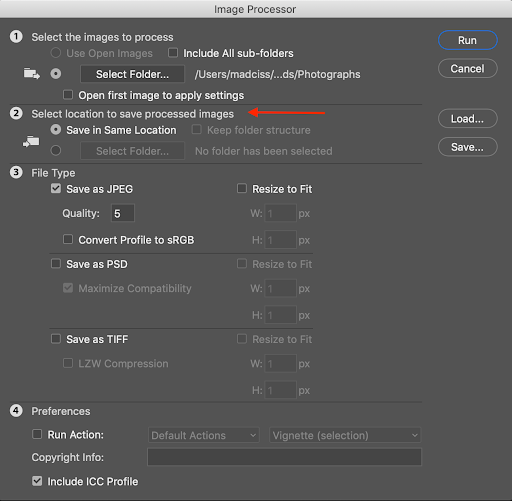
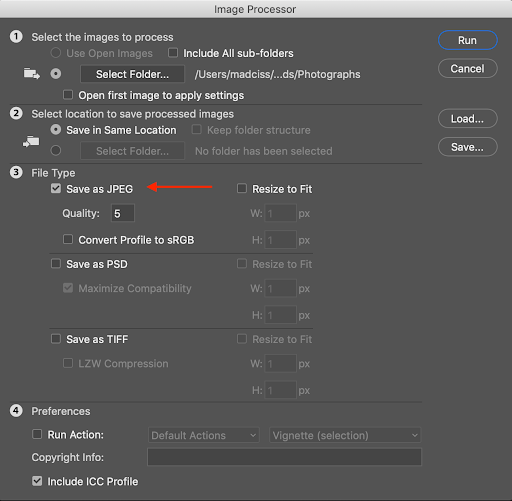
- In section 3, “File Type,” we recommend that you save the files as JPEGs.
- In section 4, “Preferences,” on the right hand side of the section, click “Resize to Fit,” then set the resizing parameters to 1500 for both W and H
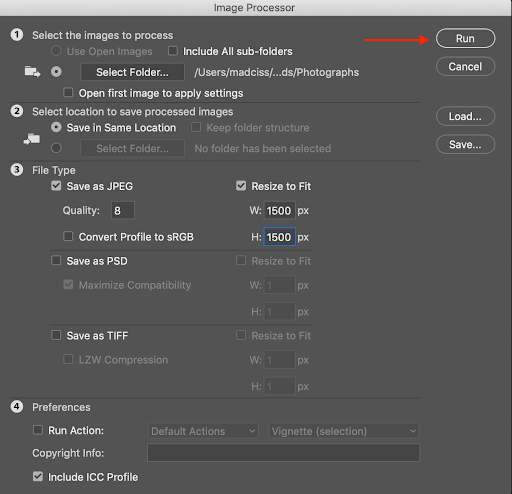
- Click the “Run” button in the upper right corner of the Image Processor window. Photoshop will open, resize, and save each image based on the parameters you set in the script.
- Review your resized files by navigating to the location or folder where you chose to save your outputs.